Showing posts with label maryinthekitchen. Show all posts
Monday, February 10, 2014
Gluten-Free/Paleo Avocado Fries
I am personally not Gluten-Free or on the Paleo diet but I thought I would provide this version of the recipe for all of those who are :)
Avocado Fries
3 Avocados
Coconut Oil for frying
1 bag of Almond Meal/Flour
3 Eggs, beaten
1 cup Unsweetened Coconut Flakes
Salt to taste
Set up two separate bowls. One with almond/coconut mixture/salt to taste - don't be shy (I don't give amounts because you just need enough mixture to cover all of the avocado slices) and one with your 3 beaten eggs.
Cut the avocados in half and then slice them vertically into 4 inch by 1 inch wedges. Set them aside.
Heat the coconut oil in a frying pan, be sure to add enough so that it is 3 to 4 inches deep.
Drop each avocado piece in first your egg mixture and next in your almond/coconut mixture. Place them in the hot oil and fry them for only about 15-30 seconds per side (keep a keen eye on them - they tend to brown very quickly depending on how hot your pan is).
Remove the avocado fries from your pan with tongs and set them on a plate preferably lined with paper towels, to absorb the excess oil. Enjoy and serve with your favorite dipping sauce!!
Labels:
appetizers
,
avocado
,
avocados
,
fries
,
gluten
,
gluten-free
,
kitchen
,
mary
,
maryinthekitchen
,
meal
,
paleo
,
recipe
Avocado Fries
If you have not had the joy of trying these yet, you are in for a serious treat. A friend and I ordered them as an appetizer and salivated over how delicious they were. I knew I needed to recreate them at home. They were super simple and I knew you all would appreciate the fact that there is a delicious gluten free/paleo version to them as well! Please refer to that post for the recipe. They are best served with ranch, spicy mayo or spicy/sweet ketchup (also known as chili sauce). Have at it!
Avocado Fries
3 Avocados
Coconut Oil for frying (Vegetable oil will do just fine)
1 can of Seasoned Panko Bread Crumbs
3 Eggs, beaten
3 cups of Flour
Salt to taste
Set up three separate bowls. One with flour, one with your seasoned Panko Bread Crumbs and salt to taste (don't be shy), and lastly, one with your 3 beaten eggs.
Cut the avocados in half and then slice them vertically into 4 inch by 1 inch wedges. Set them aside.
Heat the coconut oil (or vegetable oil) in a frying pan, be sure to add enough so that it is 3 to 4 inches deep.
Drop each avocado piece in first your flour mixture, second your egg mixture, and lastly your Panko mixture. Place them in the hot oil and fry them for only about 15-30 seconds per side (keep a keen eye on them - they tend to brown very quickly depending on how hot your pan is).
Remove the avocado fries from your pan with tongs and set them on a plate preferably lined with paper towels, to absorb the excess oil. Enjoy and serve with your favorite dipping sauce!!
Labels:
appetizer
,
Appetizers
,
avocado
,
fries
,
kitchen
,
mary
,
maryinthekitchen
,
maryinthekitchen.com
,
recipe
,
veggies
Wednesday, January 29, 2014
Enchilada Pasta
I make enchiladas just about every couple of weeks but this just changed up the game a bit. Well really, it means that I will probably be making them once a week (changing it up between the typical tortilla version and this new pasta version). It is to die for! I recommend adding in whatever extras you like. This recipe calls for corn, black beans, and avocado... But if you like jalapenos, pinto beans, etc... mix it up! This is the mexican version of comfort food.
Enchilada Pasta
16 ounces extra wide egg noodles (1 bag)
1 1/4 cups enchilada sauce
1 cup canned corn kernels, drained
1 cup canned black beans, drained and rinsed
2 cups of Kraft Mexican Blend Shredded Cheese
1/4 cup Greek yogurt (or Greek Yogurt Sour Cream)
1 can Diced Green Chiles
1 pound Ground Beef
4 ounces cream cheese
½ a packet of Taco Seasoning *Tip: Save the other half for your next Mexican dish! Or use it all for extra flavor
Kosher salt and freshly ground black pepper, to taste
2 Avocados
1 bunch fresh Cilantro

Preheat oven to 350 degrees. Lightly oil your baking dish or coat with nonstick spray.
In a large pot of boiling salted water, cook pasta according to package instructions; drain well.
In a large bowl, combine enchilada sauce, corn, beans, 1/2 cup cheddar cheese, 1/2 cup Monterey Jack cheese, Greek yogurt and green chiles; set aside.
Side Note: Funny story. So the first time I made this I somehow missed out on cue to add enchilada sauce (even though I had purchased it). Exit stage left Mary, I know. However, I wanted to mention it here because if you have someone in your family, someone you are cooking for, or whatever the case may be, that doesn't like enchilada sauce… this recipe turned out amazingly without it. Just trust me. All of the other flavors from the diced green chiles, cilantro, avocado, etc are enough to get you in the fiesta mood.
Now that I have sufficiently embarrassed myself. Let’s move on J Add ground beef to the skillet and cook until browned, about 3-5 minutes. Stir in cream cheese and taco seasoning until cream cheese has melted. Stir in pasta and enchilada mixture until well combined; season with salt and pepper, to taste.
Add pasta to prepared baking dish and top with avocado and remaining cheeses. Place into oven and bake until cheeses have melted, about 5-10 minutes.
Serve immediately, garnished with cilantro. The more the merrier.
Wednesday, January 22, 2014
Parmesan Crusted Tilapia
One thing I can not stand about cooking things like fish is that all-too-well known 'buy it on Sunday, ya don't eat it by Wednesday, and...TRASH.' Working around that I started to buy frozen fish. The only one that I personally like to buy frozen, rather than fresh, is tilapia. It is a white, flaky fish that can pretty much be cooked any way you like. Whether blackened, fried, crusted, or plain with a little seasoning. One way I found to 'wow' a generally known to be bland fish, is to crust it! So throw those puppies into the microwave, defrost, and let's get started.
This recipe is super simple and requires close to no clean-up. That is my kinda weekday night recipe!
Parmesan Crusted Tilapia:
4-6 pieces of frozen Tilapia (defrosted)
1 bag of Kraft Fresh Take Italian Parmesan Recipe Blend (cheese section)
1/2 cup of Mayonnaise
A couple squirts of lemon juice (I chose to buy lemon juice as opposed to plan out buying a lemon each and every time I want to use a little!)
Preheat your oven to 375 degrees. After thawing the tilapia in the microwave, or however you'd like to do so, prepare your baking pan. By prepare I mean, line it with tin-foil to provide for easy clean-up! Lay each of your pieces of tilapia on your baking sheet an inch or two apart.
Next, top the tilapia pieces with a thin layer of mayonnaise. The mayonnaise is not for flavor, so by thin I mean THIN. It is simply a sticking mechanism for the crust. Top the now covered in mayonnaise tilapia pieces with the mixture of bread crumbs and parmesan to create a nice crust layer.
Then, squeeze a tiny bit of lemon juice on top of each piece for some minimal citrus flavoring. Lastly, you may have noticed that I didn't call for a little melted butter in the bread topping as a thickening crust agent. Well, that is because I try to steer clear from butter whenever possible! My tip that provides for the same outcome is to spray the top of the crusted pieces with butter-flavored cooking spray. How perfect is that?
Place your baking sheet in the oven for about 10-15 minutes or until a little browned on the tops and you are set! Whether you are wow-ing a whole dinner party or just cooking for a special someone, this recipe is a super simple way to incorporate a lot of flavor and a beautifully presented fish dish all in one!
Pistachio Crusted Chicken
I do love chicken, but I am constantly trying to find ways to keep it interesting. Well, HERE. WE. GO. If you have kids, a picky eater, someone who loves chicken, or really just anyone... they will probably love this recipe! I had it for the first time at a dinner party and fell in love. After making it a couple of times, I found what version of it worked best for me. It pairs really well with mashed potatoes and creamed spinach. Basically heaven on a plate. Give it a try and please do tell me what you think!
Pistachio Crusted Chicken
1 cup chopped/smashed Pistachios (or any pistachio blend) *no shells
½ cup of Bread Crumbs
½ cup of Olive Oil
¼ cup of Honey
*Some recipes call for 2 tablespoons of Dijon Mustard in the sauce - you are welcome to try that as well!
Salt and Pepper to taste
1 ½ pounds of Boneless Chicken Breast Tenderloins (Chicken Strips)
Preheat oven to 375 degrees F. For easy clean up, line your baking sheet with tin foil or lightly coat it with cooking spray.
Chop your pistachios, or I prefer to add them to a quart size plastic bag and smash them with a handy wine bottle. Mix together the pistachios and bread crumbs in a bowl. In a separate bowl, mix the olive oil, honey, salt and pepper together until smooth. Dip the chicken tenderloins into the olive oil mixture, and then coat it with the pistachio mixture. Place the tenderloins onto the baking sheet.
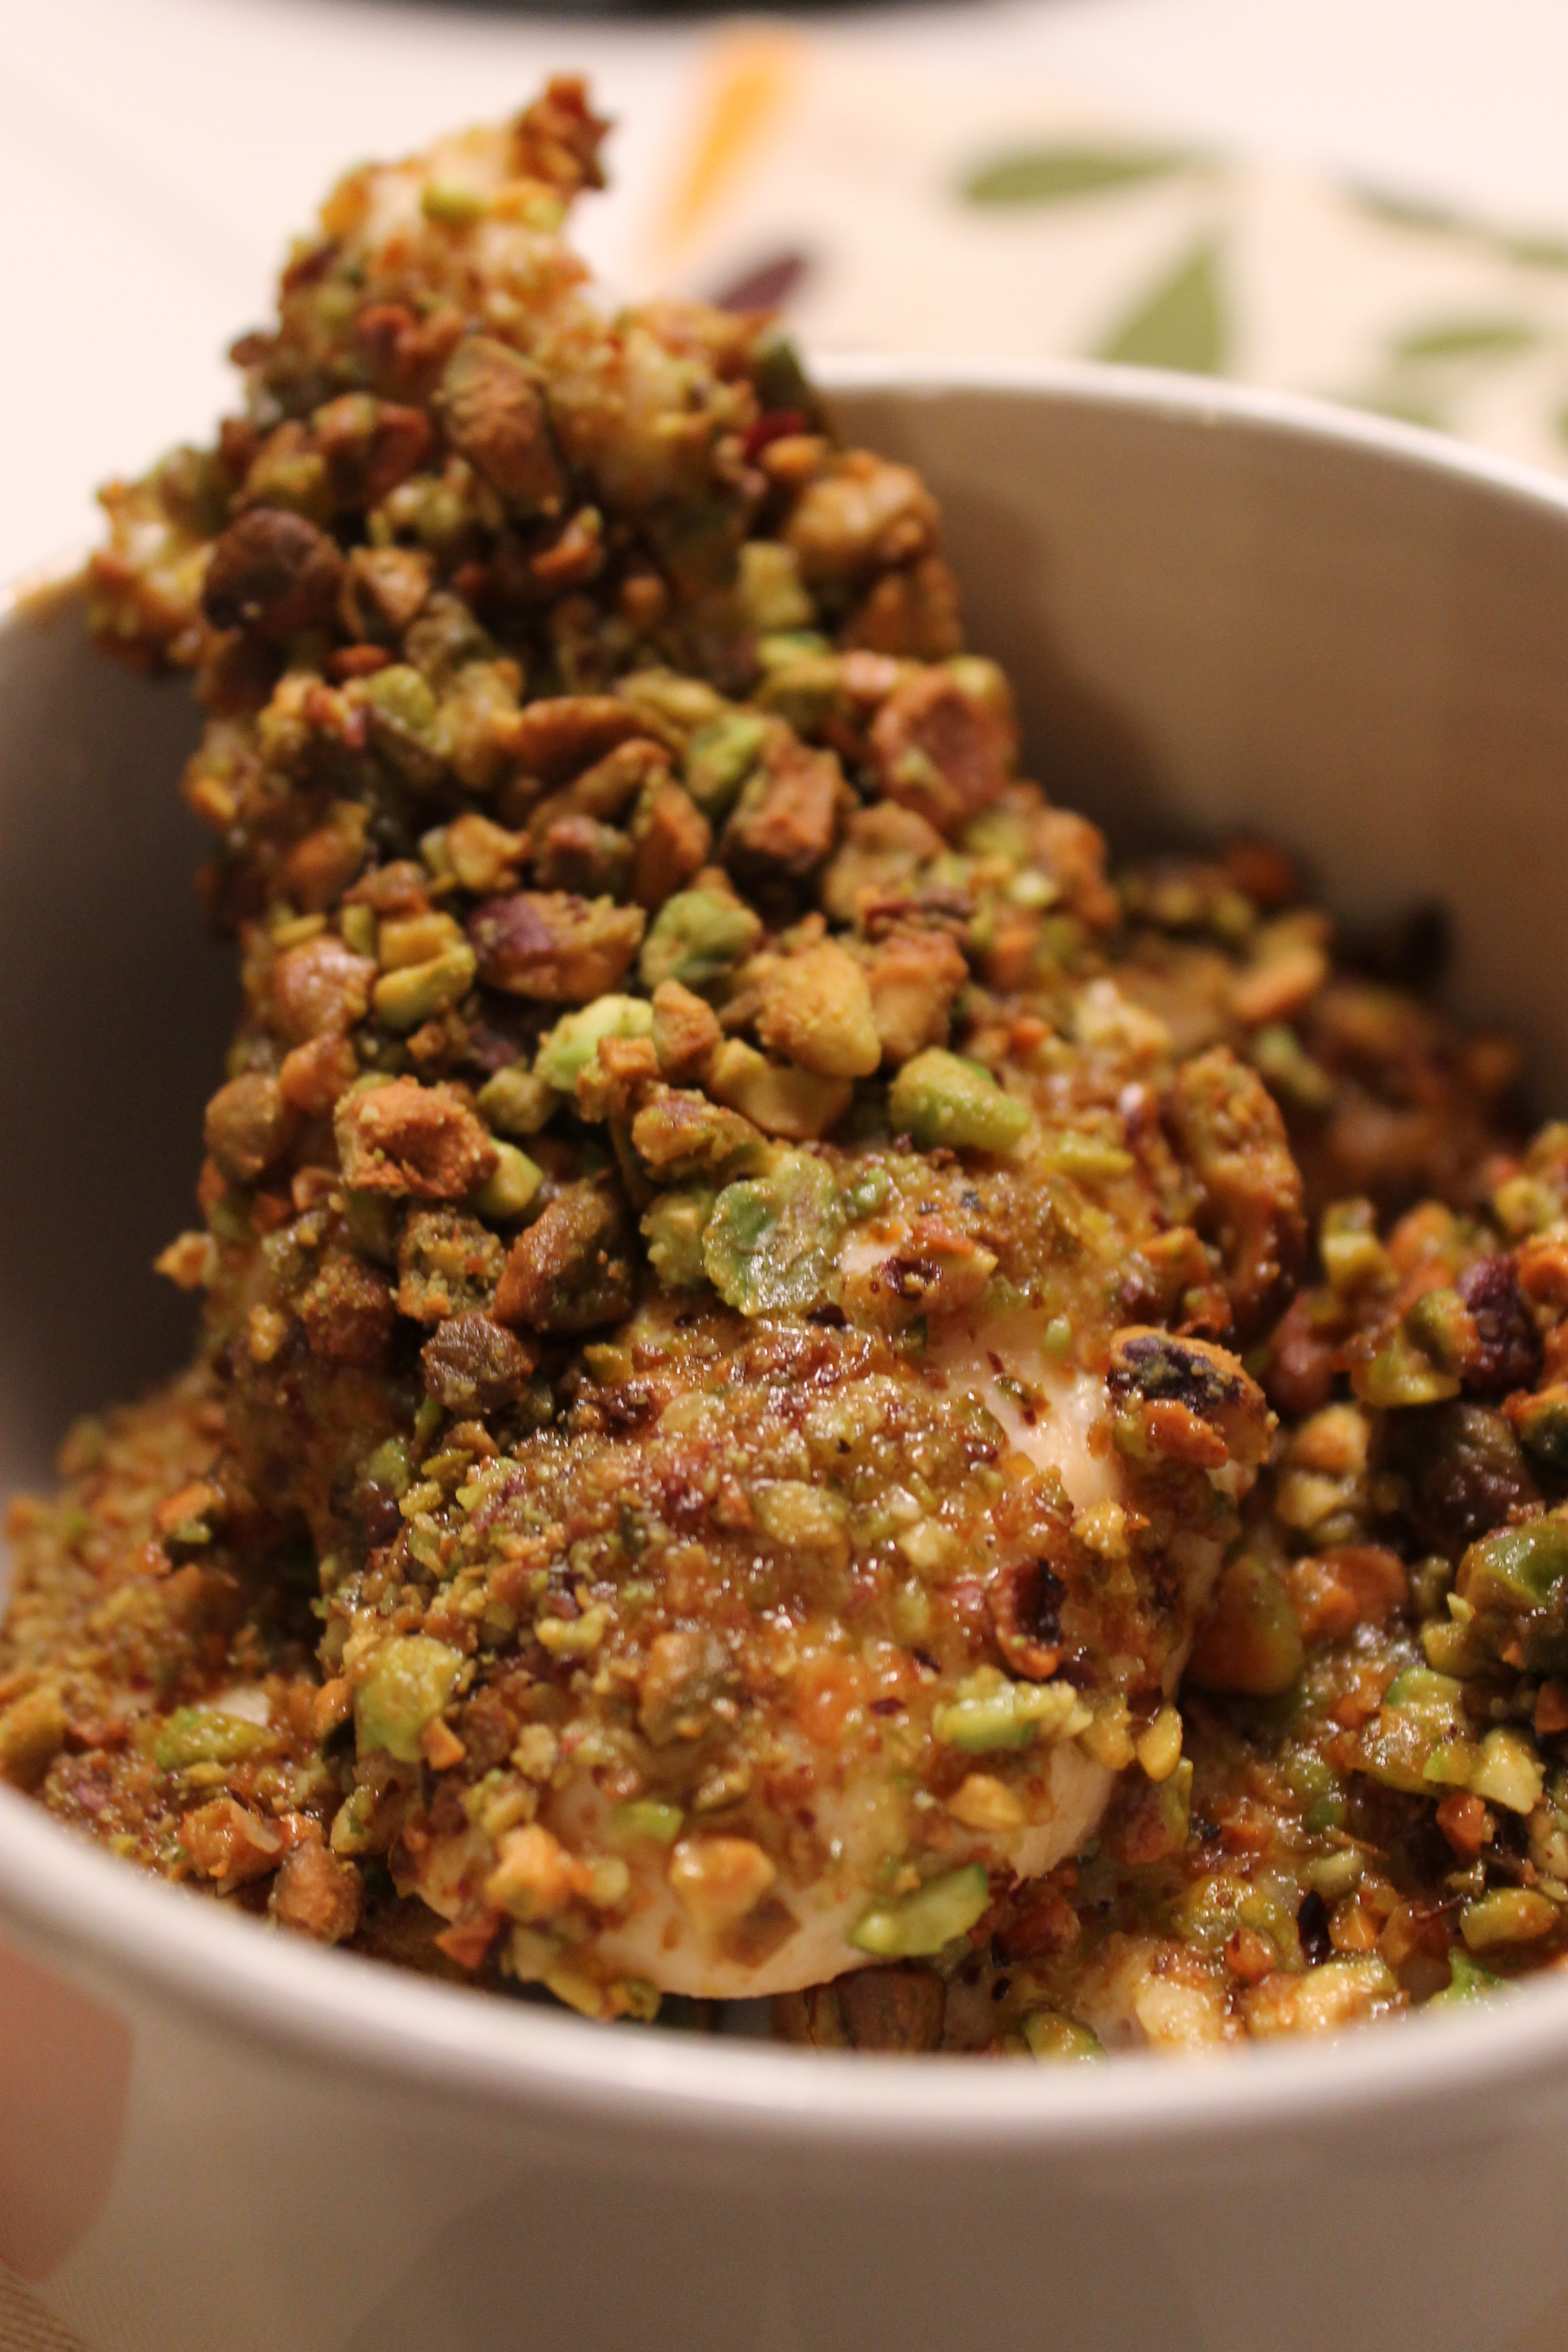
Place the baking sheet into the oven. Bake the chicken tenderloins until the chicken is no longer pink and the coating starts to turn golden brown. The cooking time takes anywhere from 10-20 minutes depending on the size of the tenderloins. Just keep a keen eye on ‘em! You’ll know. It will look a little something like this...
You really can't beat the mixture of salty (pistachio) and sweet (honey) flavor that comes packed into these chicken tenderloins. I recommend trying this recipe even if you are not a pistachio lover - you will be pleasantly surprised!
Labels:
Chicken
,
crusted
,
dinner
,
honey
,
inthekitchen
,
kitchen
,
mary
,
maryinthekitchen
,
maryinthekitchen.com
,
oil
,
olive
,
pistachio
,
pistachios
,
recipes
,
tenderloins
Tuesday, January 14, 2014
Korean BBQ Steak Tacos with Honey Sriracha Slaw
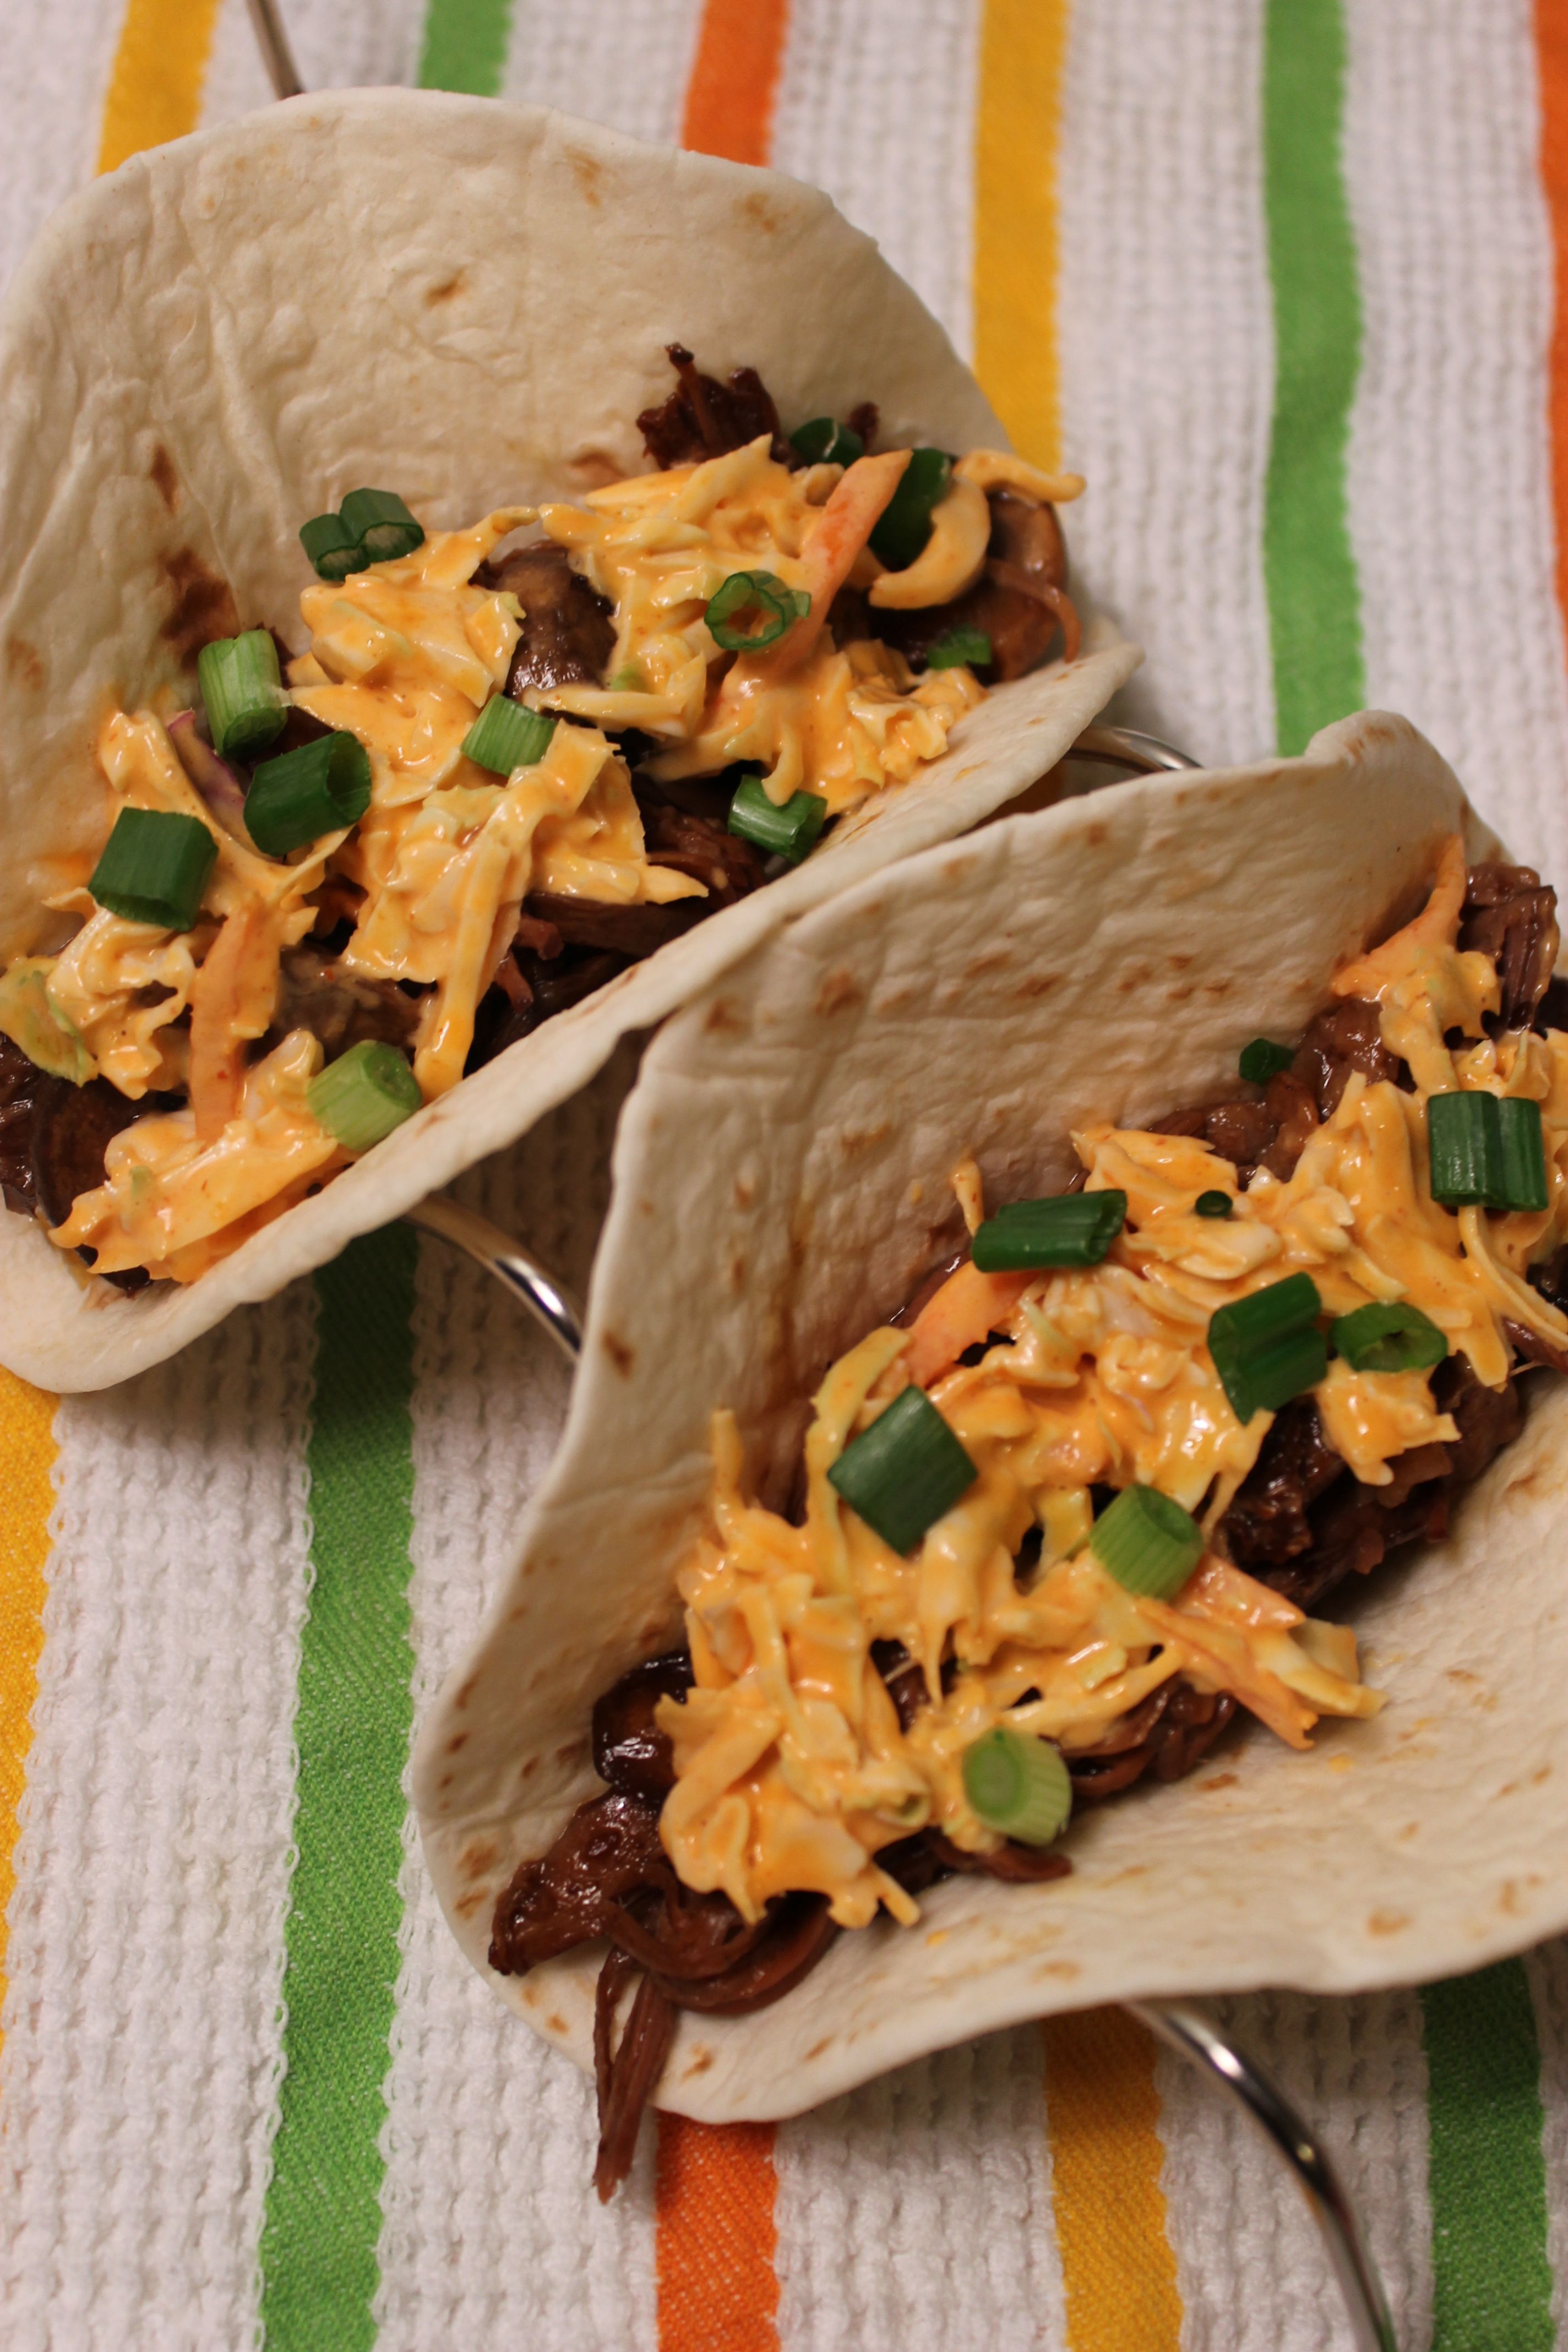
Who said Crock-Pot recipes needed to be hard? Campbell’s certainly didn’t. They recently came out with a line of ‘Slow Cooker’ sauces that have made making Crock-Pot dishes almost impossible to turn down. With my pure love of Asian food, I was ECSTASTIC when I saw they had a Korean BBQ version of the sauce. Instant light bulb went off: TACOS!
It’s fairly easy to come up with things to put on a flour tortilla, but it is not often that you find something new and different. I thought you all would really appreciate this Mexican dish with some Asian flare for not only its flavor but its simplicity, too! Have at it :)
Korean BBQ Steak Tacos with Honey Sriracha Slaw
2-3 pounds of Chuck Roast Steak (make sure there is some marbleization so that it doesn’t get tough)
1 package of Campbell’s Slow Cooker Korean BBQ Sauce
1 carton of sliced Mushrooms
1 package of shredded Cabbage (you only need to use about 3 cups worth)
¼ cup of Mayo
1 tablespoon of Sriracha
1 tablespoon of Honey
1 package of small Flour Tortillas
Optional:
1 bunch of Green Onions
1 bunch of Cilantro
Set your Crock Pot to low and add your whole chuck roast as well as your mushrooms.
Pour the entire contents of the Campbell’s Slow Cooker sauce into the Crock Pot. Let it sit on low for the remainder of the day (6-8 hours).
Once it is done cooking, use a fork or tongs to shred the meat a bit. Add your desired amount of shredded steak and mushrooms to your flour tortillas.
In a bowl, combine your shredded cabbage, mayo, sriracha and honey. Stir the ingredients and top your tacos off with the mixture. Lastly, add chopped green onions and cilantro to your tacos, if you wish (I would recommend doing so!)
And that’s all folks. You heard it here first.
Labels:
asian
,
cilantro
,
crockpot
,
dinner
,
honey
,
inthekitchen
,
kitchen
,
mary
,
maryinthekitchen
,
maryinthekitchen.com
,
mexican
,
onions
,
recipe
,
recipes
,
Slow Cooker
,
sriracha
,
steak
,
tacos
Sunday, January 5, 2014
Freezer Breakfast Sandwiches

Today's post isn't so much a recipe but a great idea I'd like to share! As someone who isn't the biggest fan of sweets, breakfast is a rather hard meal for me during the week when I am on the go. The healthy breakfast options that are available usually steer on the sweet side (ie granola bars, smoothies, etc). This girl definitely prefers the savory option.
With that said, savory on-the-go breakfast meals in the frozen section (that are oh so good) have ingredient lists that would displease just about anyone! It wasn't until just the other day that I decided it was time to make my own frozen breakfast sandwiches. I choose the ingredients, I know the ingredients, and above all else these sandwiches sit at about 200 calories a pop - I'll take it!
Freezer Breakfast Sandwiches
1 carton of Egg Beaters
6 Bagel Thins (love me some everything bagels)
Salt and Pepper
12 slices of Turkey or Ham
6 slices of Cheese (Pepper Jack, Cheddar, Swiss)
Plastic Bags
Preheat the oven to 350 degrees. Spray a muffin pan with nonstick spray and pour your Egg Beaters into each section only filling it about 1/3 of the way. Bake the eggs in the oven for 10-15 minutes (or until done). Once they are done, season with salt and pepper while they are cooling. Once they are cooled, spoon them out and onto a plate (we will use them in a couple of minutes).
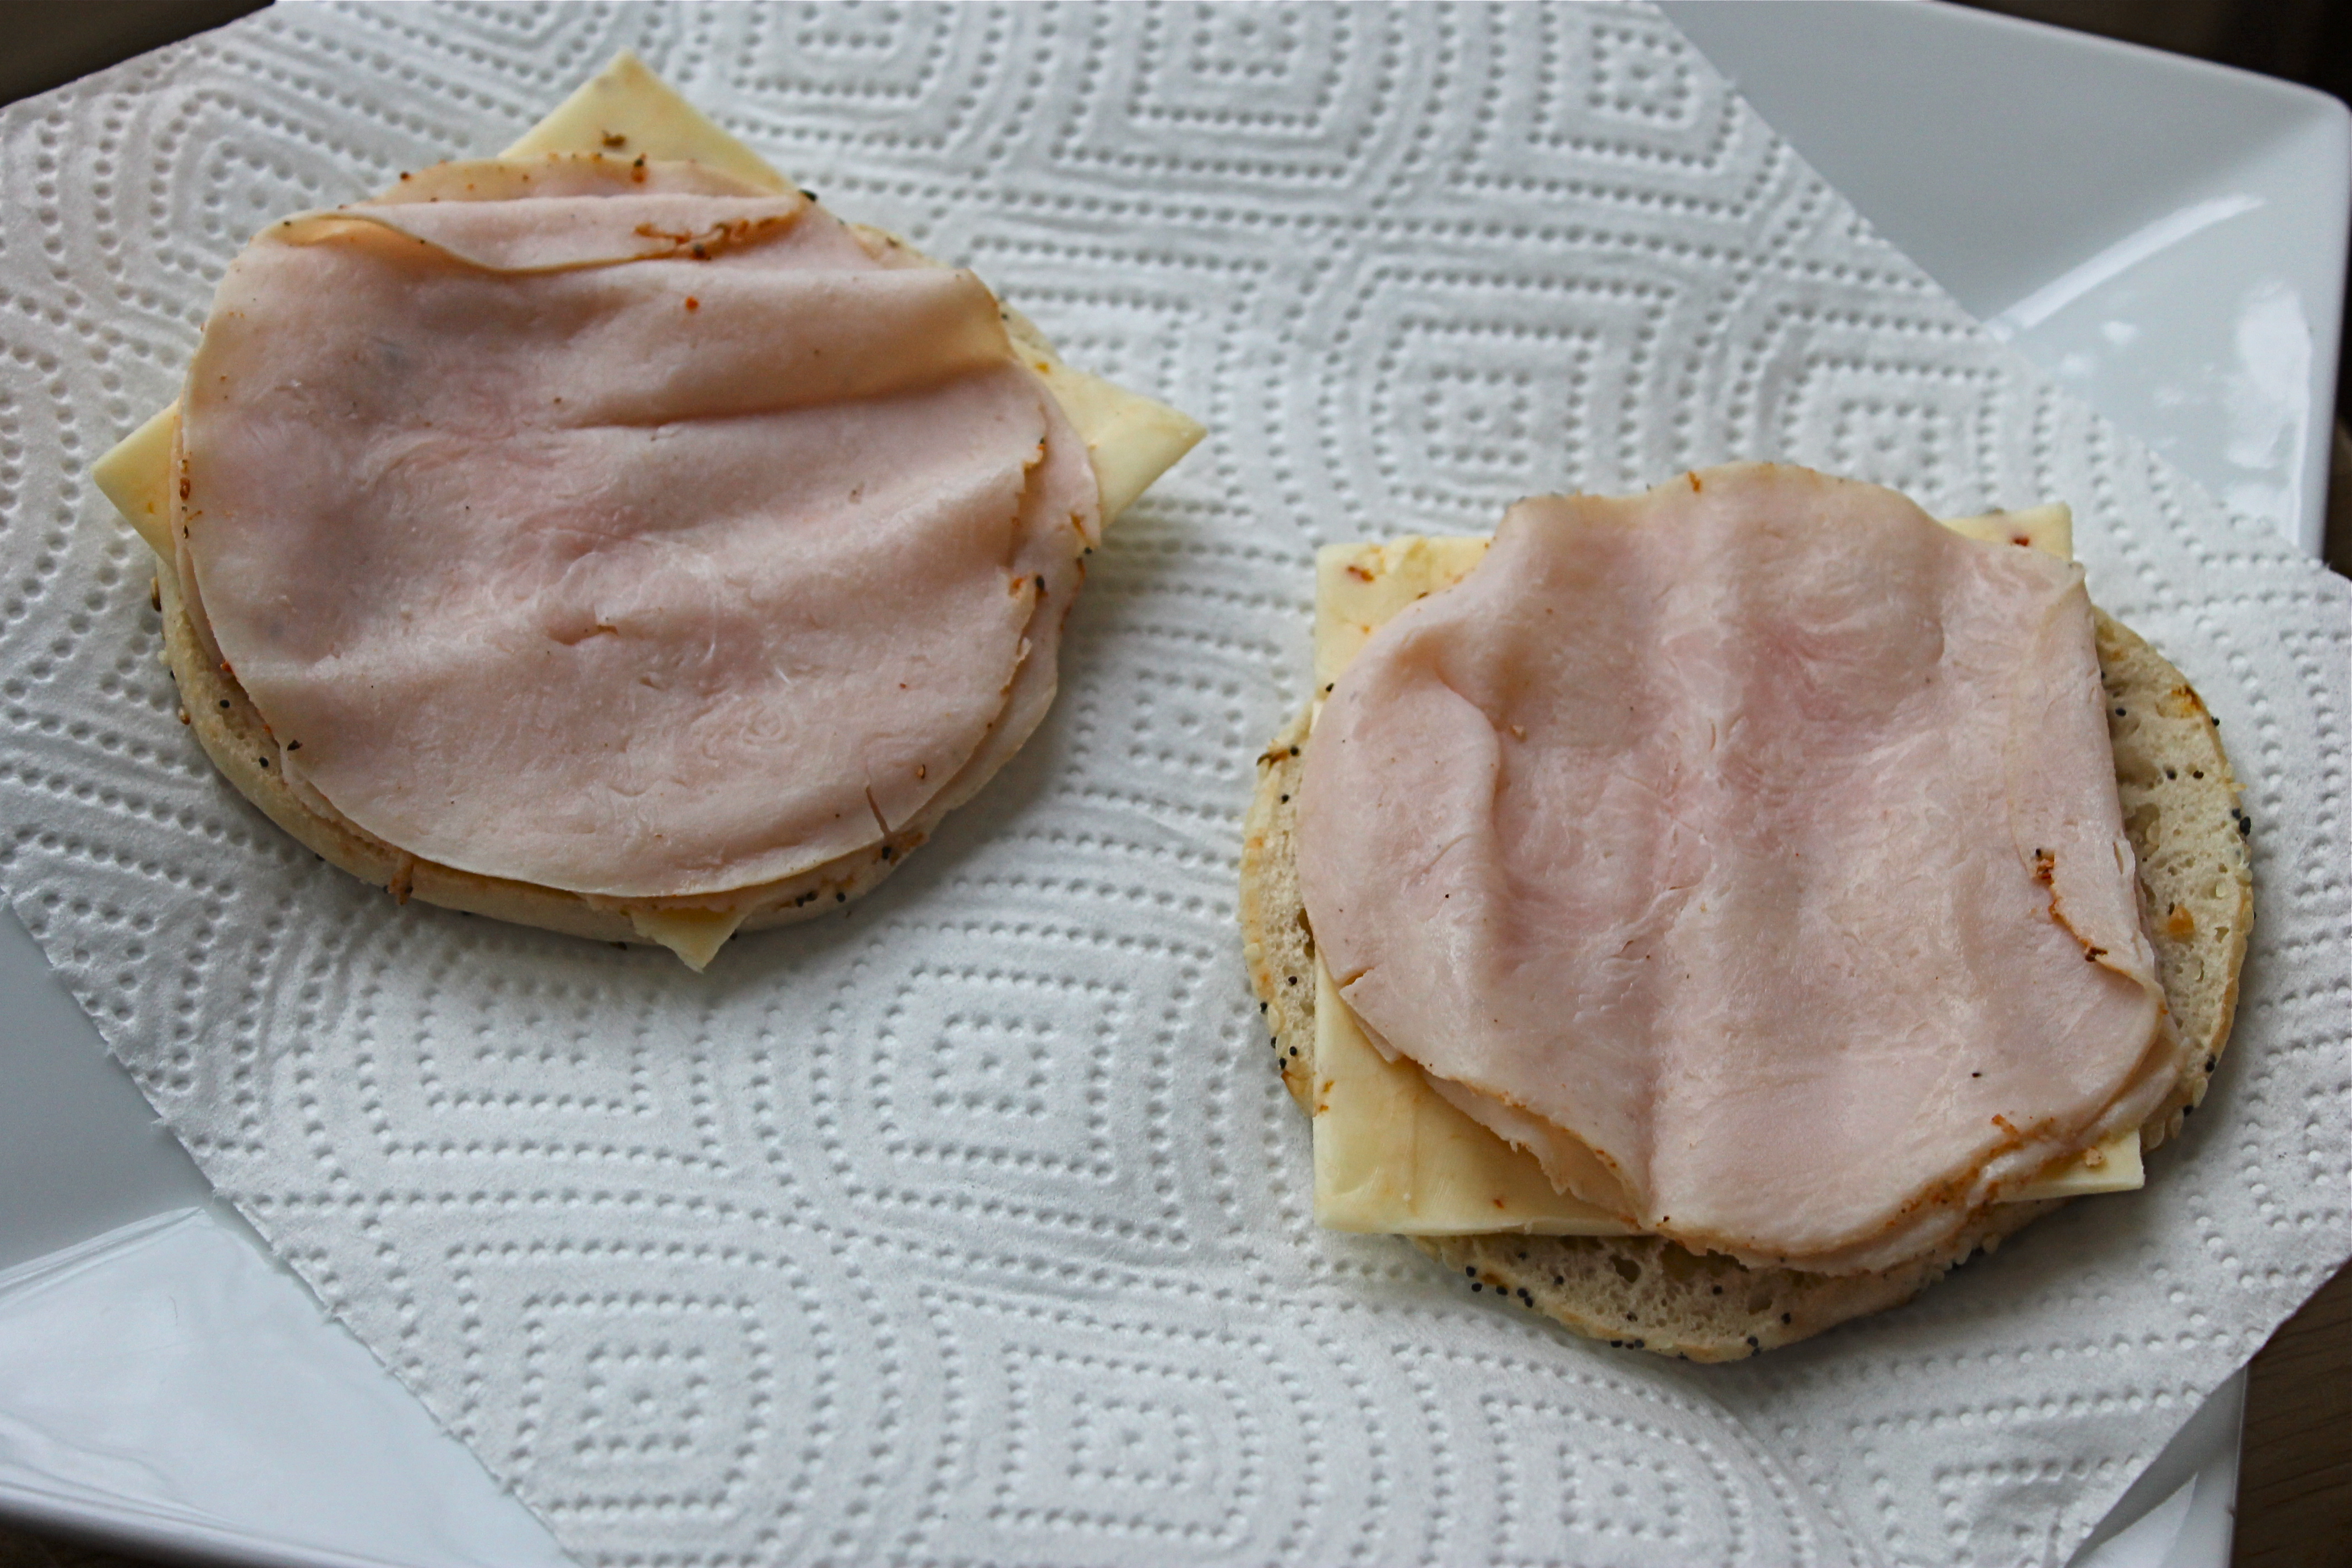
Layer each of your bagel thins with one slice of cheese, two slices of meat and two muffin sections full of egg pieces.
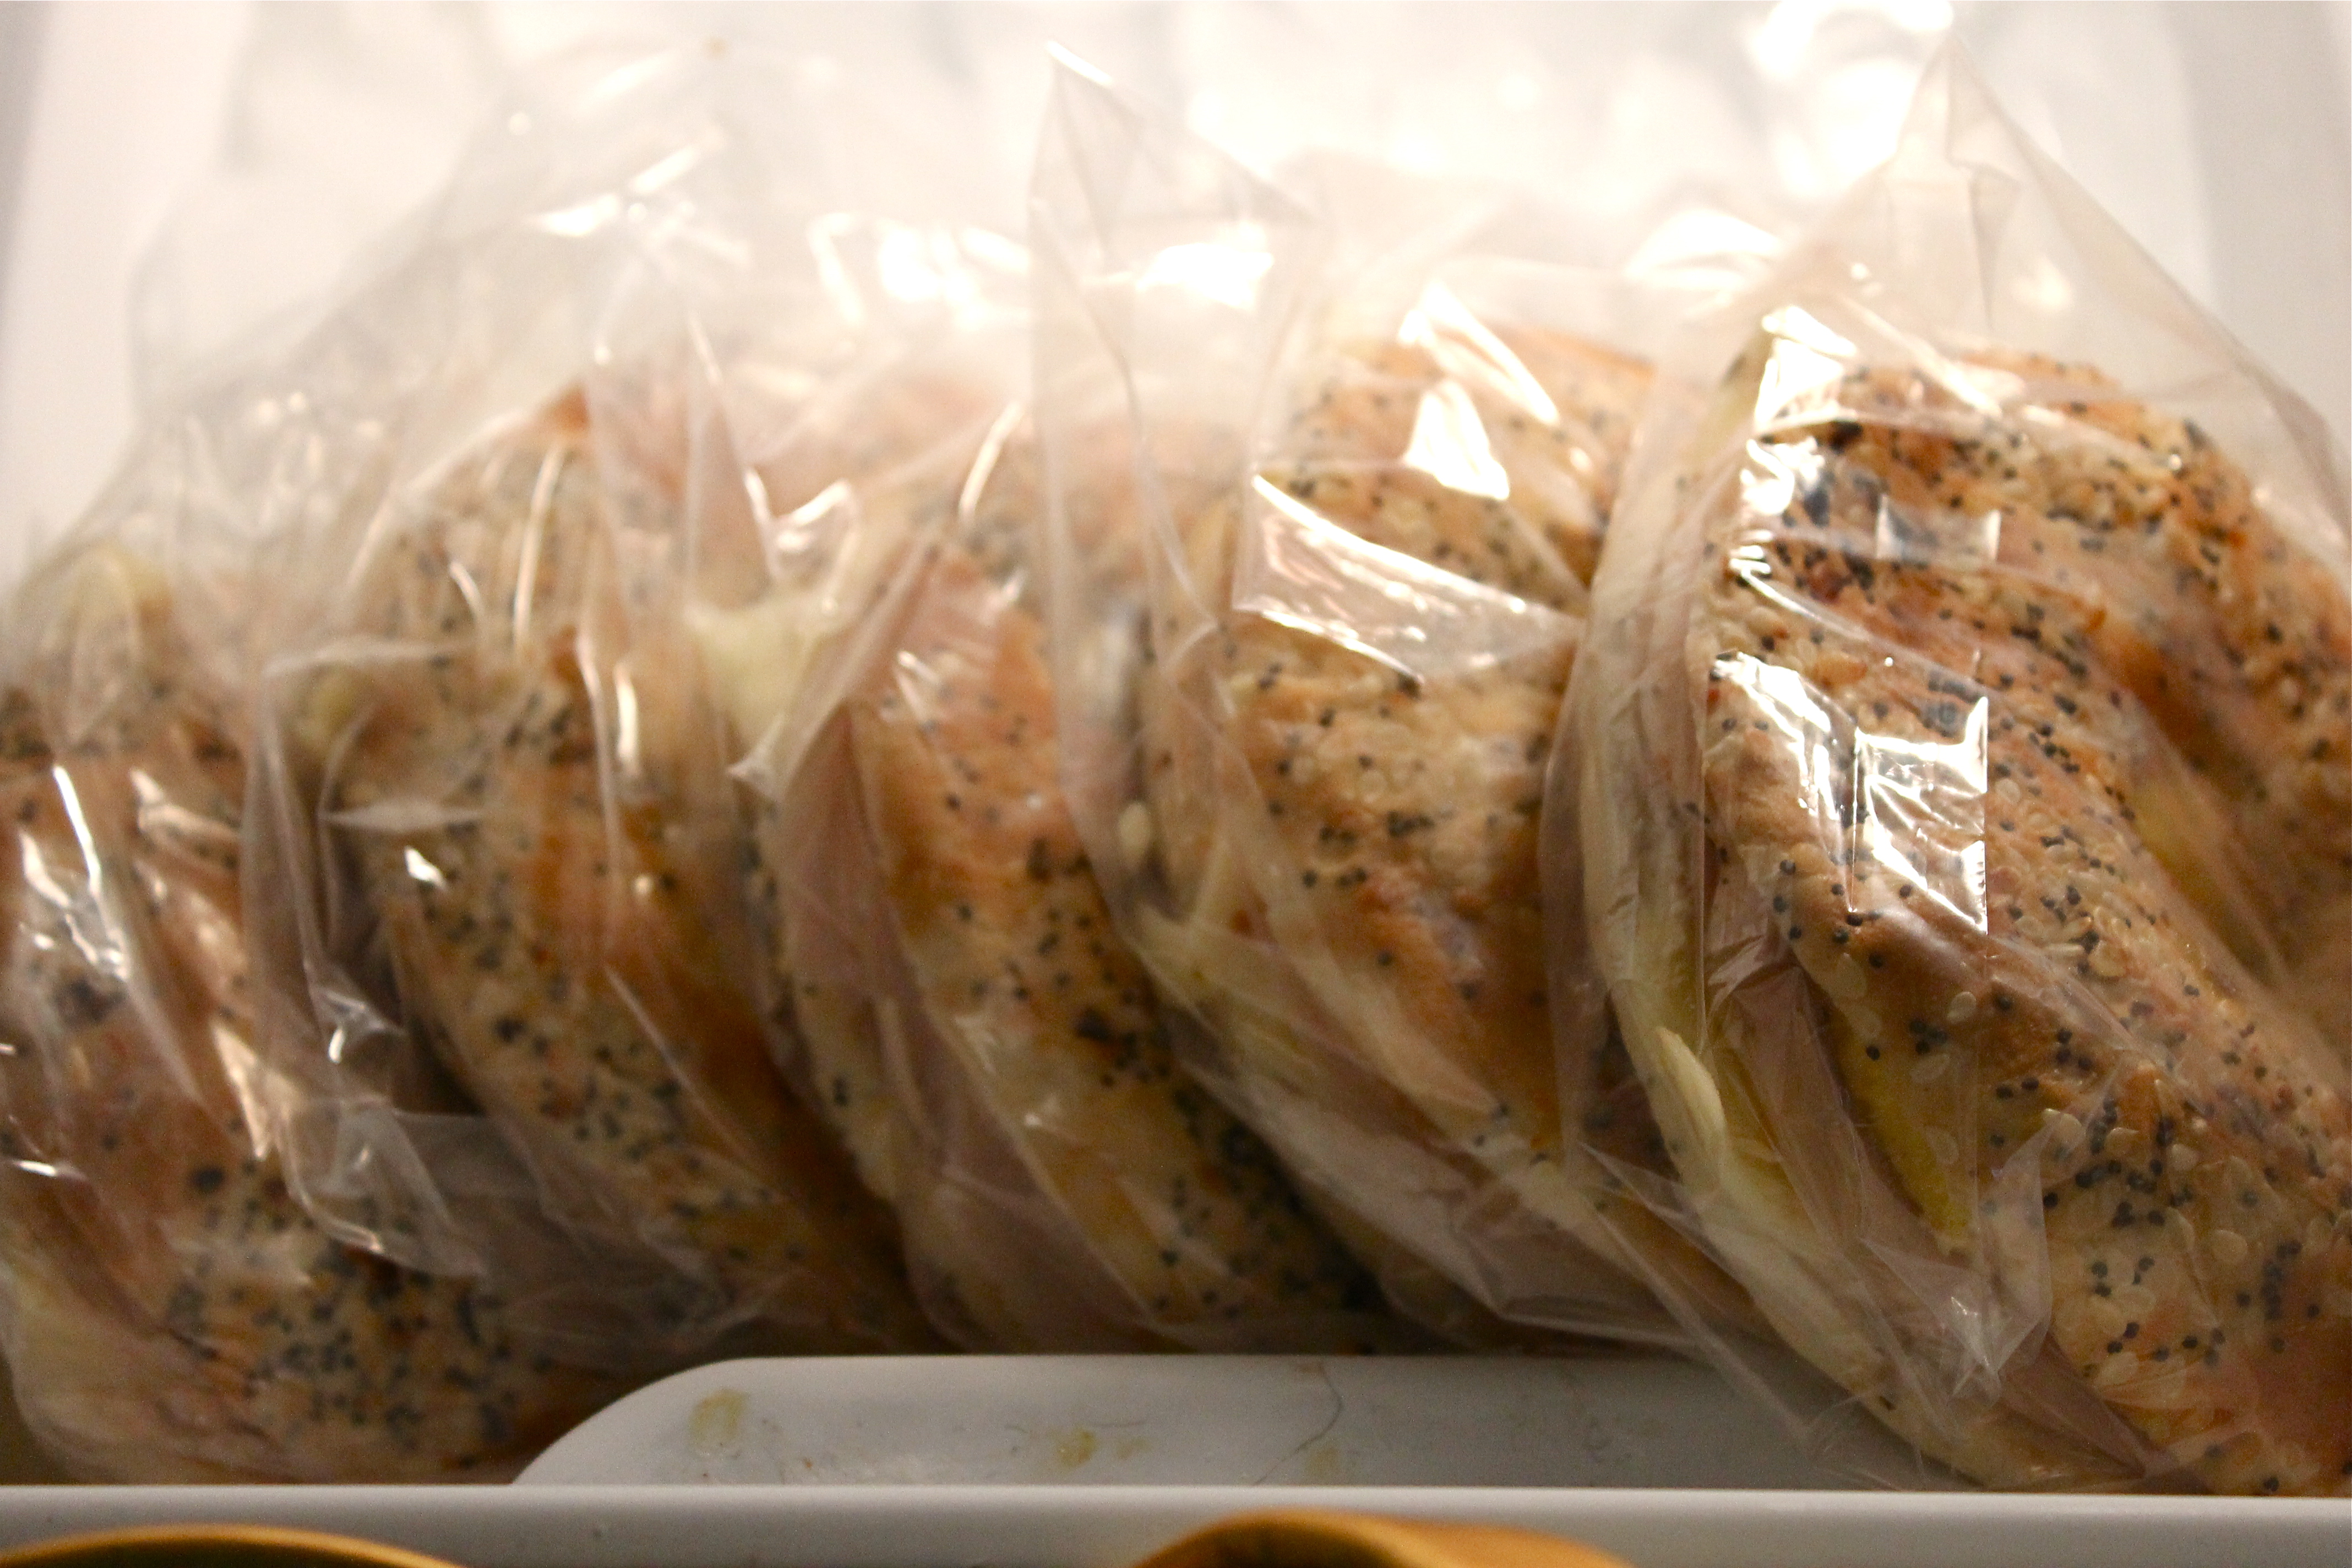
Place sandwiches in plastic baggies and freeze.
On your way out the door? Grab a sandwich and go! :) My mornings just got a whole lot better...
Labels:
bagel
,
breakfast
,
cheese
,
food
,
freezer
,
healthy
,
inthekitchen
,
mary
,
maryinthekitchen
,
maryinthekitchen.com
,
recipe
,
sandwich
,
tips
,
turkey
Sunday, December 29, 2013
Man Pleasing Chicken

Pinterest is every girl's best friend. Really I don't know how our Mothers and Grandmothers weathered the cooking, party planning and baby planning storm without it! With that said, when I came across this recipe - the name said it all. It's the grown up version of sweet and savory honey mustard sauce... smothered... all over... everyone's favorite: chicken.
Some versions of this are done with chicken breasts or bone-in chicken thighs, well friends, time and time again I prefer the boneless chicken thighs for the flavor and texture after a long baking time in the oven. This recipe is sure to please more than just the 'man' but the whole dinner table. I recommend serving it with mashed potatoes or cauliflower mash for a healthier take at the traditional mashers (see cauliflower mash recipe). NOTE: If you don't have much cooking experience but want to knock a dinner table's socks off, this is the recipe for you.
Man Pleasing Chicken
1/2 cup Dijon Mustard
1/4 cup Maple Syrup
1 tbsp Rice Wine Vinegar
6 Chicken Thighs (1 1/2 pounds)
Salt and Pepper
Preheat oven to 450 degrees.
Mix Dijon mustard, maple syrup and rice wine vinegar together in a bowl. Place chicken thighs in oven proof dish salt and pepper chicken. Be sure to use your tin foil for easy clean up. Pour mustard, maple, vinegar mix over the the thighs. Turning the thighs over so they are fully coated.
Put your chicken in the oven and set the timer for 40 minutes. I have found that the amount of time the chicken takes can range anywhere from 25-40 minutes (I personally like mine to have some browning on the top). I would recommend checking the chicken's temperature at 25 minutes. When the chicken is 155 degrees Farenheit it is done. When it is done, remove it from the oven and let it rest for 5 minutes before serving.
Top with green onions or chives if you prefer :)
Labels:
Chicken
,
dijon
,
dinner
,
food
,
inthekitchen
,
mary
,
maryinthekitchen
,
maryinthekitchen.com
,
mustard
,
pinterest
,
recipes
,
syrup
Monday, December 9, 2013
Greek Yogurt Remoulade Sauce

Creole style. Is there any other way? Yes... but creole mustard makes this recipe to die for - so just go with it.
Greek yogurt is becoming a staple ingredient in all sorts of healthy alternative recipes from brownies to veggie dips. To be frank, I personally think it tastes better in most dishes than it's lard-filled cousin, mayo.
One of my all time favorite purchases from Trader Joe's for a quick fix meal are their crab cakes from the frozen section. Their good for you, packed with flavor and taste like you bought all 20+ ingredients and made them yourself! A perfect way to punch up the flavor even further and feel like you did a little cooking in the kitchen is to make this creole style Greek Yogurt Remoulade Sauce. Let's get started...
Greek Yogurt Remoulade Sauce
1/4 cup Greek Yogurt
1/4 cup Mayo
1/4 tsp Worcestershire
1 tblsp Creole Mustard
1 tblsp Capers
1 tsp of Horseradish (optional)
3-4 drops of Hot Sauce to taste
Salt and Pepper
Now this is really intense so take a deep breath...
Mix all of the ingredients together and refrigerate for 1 to 2 hours before serving. Drizzle on top of the crab cakes... and lots of it :)

*Trader Joes crab cakes from the frozen section pictured above
Labels:
crabcake
,
crabcakes
,
dinner
,
Fish
,
greek
,
inthekitchen
,
mary
,
maryinthekitchen
,
maryinthekitchen.com
,
recipe
,
remoulade
,
sauce
,
Sauces
,
yogurt
Saturday, September 14, 2013
Two Ingredient Cookies
'Sweet tooth' is definitely not ever anything that comes to mind for me, but I can definitely appreciate any healthy, wonderful mix of ingredients. I have a feeling you will not believe this recipe until you try it. With that said, the base of this cookie LITERALLY has two ingredients. Yup, you heard me right, two ingredients! You still have the ability to add your own 'chef' flare, however. In the recipe below, I decided to add chocolate chips and pecans as well. Have at it people!
Two Ingredient Cookies (Makes 12 small cookies)
3 Bananas
1-1 1/2 cups of oats (ready-made oatmeal)
.... That's it.
But I added:
1/4 cup of Chocolate Chips
1/4 cup of crushed Pecans
Preheat your oven to 350 degrees.
The key here is to use old bananas. However, who has time to wait for them to get old? Right? Right. So I would buy new bananas and stick them in the microwave for about one minute. Once they are slightly soft, mash them up with a fork. Add dry oats. Then, if you wish to cheat and add more ingredients like myself, this is where you would do so. I would recommend things like pecans, chocolate chips, pumpkin puree, caramel, and the list goes on.
Form the 'cookie dough' into whatever size cookie you would prefer on a greased (don't forget this) baking sheet. Pop these heavenly, healthy, knock your socks off cookies in the oven for about 15 minutes or until browned.
You can't go wrong with a cookie that weighs in at about 45 calories. Eat 'em while their hot, eat to your hearts content and serve with milk!
Labels:
bananas
,
chocolate
,
cookie
,
cookies
,
dessert
,
Desserts
,
ingredient
,
inthekitchen
,
mary
,
maryinthekitchen
,
maryinthekitchen.com
,
oatmeal
,
pecans
Thursday, May 2, 2013
Teryiaki Pork Tacos with Sriracha Slaw
As I've stated before, who in the world doesn't love tacos? You can (quite literally) put anything in them! This specific taco recipe came about due to our love for those already-marinated pork tenderloins at the grocery store. Smithfield is probably the most popular brand, but there are tons out there with lots of fun flavors like garlic & herb, cajun, and… teriyaki! We eat them all the time, but I wanted a new way to utilize them in a dish other than just pairing it with some mashed potatoes and veggies. And then came these Asian-inspired pork tacos…
The pork is already done for you, minus the cooking part, so the only ‘work’ portion of this recipe is the toppings and the sides! My kind of dinner.
Teriyaki Pork Tacos with Sriracha Slaw
1 already-marinated pork tenderloin (teriyaki preferred)
2 cups of packaged shredded cabbage (coleslaw without the sauce)
2 tablespoons of Sriracha (hope you like it hot!)
2 tablespoons of Sour Cream
4 flour tortillas
1 avocado
1 lime
Cilantro for garnish
Cook the pork tenderloin based on the directions indicated on its’ packaging. While that is cooking, mix the cabbage, sriracha, and sour cream together in a bowl and set aside. Next, sliver the avocado into slices that will fit well on the tortilla. Once the pork tenderloin is done (be sure it is 160 degrees and has no pink areas) cut it into bite size pieces. Place these pieces, the sriracha slaw, and avocado onto your tortillas… And… THAT IS IT! Serve a lime wedge on the side in-case your taste testers want to add a little zing to their tacos (this is recommended).
This recipe is beyond easy, not to mention, has a wonderful depth of flavor and is perfect for any night of the week. You’d be crazy not to try! What is your favorite kind of taco? Fish? Spicy Chicken? Please share!
Labels:
cilantro
,
coleslaw
,
inthekitchen
,
lime
,
mary
,
maryinthekitchen
,
maryinthekitchen.com
,
mexican
,
Pork
,
slaw
,
sriracha
,
taco
,
tacos
Thursday, April 25, 2013
Charcoal Grilled Salmon

It’s official. There is nothing better.
I thought I enjoyed salmon just as much as the next, but until you’ve had it on a charcoal grill, you have not lived the salmon-eating life. My flare for the dramatic is not by accident, it is just that good! For those of you who cook on a charcoal grill, you may be wondering how the salmon manages to not fall between the cracks and into the burning coals… Well, with some extra care, it is in fact possible to have a full piece of salmon at the end of the grilling process. It’s all in the flip action.
These ingredients are similar to my other salmon recipe, but with the added dimension of flavor that the charcoal gives you, I believe most all marinades and/or spices would work just as well. The really important piece of information here is to understand that “good things come to those who wait.” When it comes to grilling, you will be well rewarded if you follow this flipping process to a tee!
Citrus-Soy Glazed Salmon:
1 pound of Salmon (two pieces)
1/4 of a cup of ANY type of Citrus Juice
1/4 of a cup of Soy Sauce
Steak Seasoning to taste (I pretty much use this on anything going on the grill)
While you are heating up your charcoal grill, place all of your ingredients in a large plastic bag (minus the seasoning-I usually sprinkle this on right before it goes on the grill). The salmon only needs a short amount of time to soak up the marinade. As a rule of thumb, fish should not sit in marinade longer than about 20 minutes. Fish reacts to marinades a lot differently than meat, which often times tastes best when it is marinaded over night.
Once the grill is hot, lather some oil on and place your salmon flesh-side-down on the grill. This is where patience comes in. It is super important not to flip the salmon to its’ skin side until it is completely done cooking on this side. The more you flip your salmon back-and-forward, the more likely you are to have pieces falling through the cracks! If worse comes to worse, you can always throw your salmon in the oven for a couple minutes to finish cooking through. Cook on the flesh side for 3-5 minutes depending on the thickness of the salmon, then do the same on the skin side, but adding just a couple more minutes (crispy skin is the best!)
If you are not 100% about the temperature after this process, heat your oven to 400 degrees and add the pieces of salmon for just a couple of minutes to complete the cooking process. No worries, the charcoal flavor is here to stay!

I recommend picking up some coronas and grilling out with your loved ones on those beautiful summer nights! It
Labels:
charcoal
,
Fish
,
grill
,
grilled
,
inthekitchen
,
mary
,
maryinthekitchen
,
maryinthekitchen.com
,
salmon
Wednesday, April 17, 2013
Crockpot Chicken Philly Sandwiches

I have always been a little skeptical about the crock-pot recipe phenomena. I’m kind of obsessive over my food while it is cooking, not to mention, I am gone almost 12 hours a day. I found this idea on the “Food Family Finds” recipe blog and I immediately bought the ingredients for it. I mean who doesn’t love a chicken philly? Melted cheese, peppers, onions, spice… Mmm I’m getting hungry!
Another quarrel I used to have with crock-pot recipes is that you can not add ingredients as you go. I have never been one to follow a recipe to the tee and I’m pretty impulsive when it comes to what flavors I am looking for in a dish. With that said, I surfed the net for various chicken philly recipes and decided mine would include the following:
Crock-Pot Chicken Philly Sandwiches:
1 package of Chicken Tenderloins (smaller than breasts)
2 tablespoons of Butter
1 Green Pepper sliced
1 Yellow Onion sliced
A sprinkle of Steak Seasoning (Yes, steak)
2 tablespoons of Worcestershire
1/4 of a cup of Italian Dressing
1/4 of a cup of Texas Pete (if you like it hot! add more)
6 slices of Pepper Jack Cheese
6 Hot Dog Buns or three large Sub Rolls
Add the butter, onions, peppers, chicken, and all sauce/seasoning components to the crock-pot. Heat to low and cover for as long as you're at work or gone for the day (I’m not putting a time-stamp on this because recipes call for 5 hours, but I had it in there for 12 and it was delicious!) Once you arrive home for the day, heat your oven to 450 degrees and turn off your crock-pot. Break apart your chicken pieces with a fork until it is a pulled-chicken consistency. Spoon your crock-pot filling into your buns and add a layer of cheese to the top. Once you have finished doing this with all of your sandwiches, add them to the oven and bake until the cheese is melted and the bun is crispy!

And… THAT’s IT! This recipe is absolutely perfect for those who don’t feel like cooking when they get home. It took me just moments to throw in the crock-pot in the morning and only moments to throw together once I got home in the evening. Enjoy! And please tell me about your crock-pot recipes! Now that I’ve broken through the mold… I’m anxious to try more!
Labels:
cheese
,
chicken
,
crockpot
,
inthekitchen
,
mary
,
maryinthekitchen
,
maryinthekitchen.com
,
philly
,
sandwich
,
sandwiches