Showing posts with label Chicken. Show all posts

Tuesday, November 4, 2014

Blue Apron Delivery Service

As someone who cooks typically on a daily basis, it’s important to keep things interesting in the kitchen. Whether that mean scrolling through my trusty Pinterest board or leaning on a friend for a new recipe. Another cooking conundrum that tends to come up is the meal planning for the week. You miss one aspect of your grocery trip or original plan and the whole week is off – BOOM! Chinese takeout ensues.

Recently we tried out the Blue Apron Ingredient Delivery Service and I must say I am a pretty big fan. Do you enjoy cooking or want to learn how to? Give it a try. They essentially plan the meal for you and ship the ingredients to you for the week. My favorite aspects of the service are the lack of ‘crap, I forgot cucumbers’ and the flexibility of being able to go out if you want to and just make that meal the next night! Did I mention you can pick vegetarian, meat and/or fish dishes in your delivery service?

Blue Apron Delivery Service Furikake Salmon

Blue Apron Delivery Service Furikake Salmon


I definitely had my concerns. As a person who typically enjoys most aspects of meal planning, not having control over this portion of the meal made me wonder if this was something I would enjoy. Also, would we like these meals? We love big flavor and meals with ethnic flare! There was indeed a great balance of dishes in the weeks that we tried – not to mention you are always able to throw in your own twists. Like a little more lime in your slaw? Add it. Not feeling adventurous? Follow their instructions to the tee.

You will especially want to stick to their instructions if and when they give you out-of-the-box ingredients (another one of my favorites about the service). One of the salmon dishes we tried called for miso paste (never used it before) so they send you a perfectly portioned package of it to use down to the drop that you need it. Those times of big cans and tubs of random ingredients sitting in your fridge are gone forever (not to mention the price).

So the price – it is $9.99/person per meal. In a typical package you would be getting three meals for the week so your total would be just about $60.00. Definitely cheaper than heading to your nearest Outback or Chinese takeout – not to mention you are eating fresh and healthy ingredients in the right portions. I will say though, there are some meals that I make at home that are cheaper per person it is just a matter of what I am making and how much of it. With that said, you could not buy all of the fresh ingredients plus the out-of-the-box sauces, etc and get away with $9.99/person – so all around WINS there!

Overall, this Blue Apron idea is pretty stellar for people who love to cook or who are wanting to learn how. Do you appreciate fresh ingredients, eating well and homecooked meals? Give it a try. I hope you have enjoyed this post and more importantly I hope you get your Blue Apron Ingredient Delivery Service today!

Have you tried Blue Apron? What are your thoughts?

Rice and Beef-Stuffed Poblano Peppers with Lime-Crema Sauce


Cod & Miso Soba Noodles with Multicolored Cherry Tomatoes & Eggplant


Furikake-Topped Salmon with Fresh Edamame & Miso-Sesame Black Noodles


Blue Apron Delivery Service Furikake Salmon

Blackened Chile-Dusted Chicken with Zucchini Rice Pilaf & Corn-Tomato Salsa

Blue Apron Delivery Service Chile-Dusted Chicken

Blue Apron Delivery Service Chile-Dusted Chicken

Wednesday, January 29, 2014

Enchilada Pasta

enchiladapasta3


I make enchiladas just about every couple of weeks but this just changed up the game a bit. Well really, it means that I will probably be making them once a week (changing it up between the typical tortilla version and this new pasta version). It is to die for! I recommend adding in whatever extras you like. This recipe calls for corn, black beans, and avocado... But if you like jalapenos, pinto beans, etc... mix it up! This is the mexican version of comfort food.

Enchilada Pasta

16 ounces extra wide egg noodles (1 bag)

1 1/4 cups enchilada sauce

1 cup canned corn kernels, drained

1 cup canned black beans, drained and rinsed

2 cups of Kraft Mexican Blend Shredded Cheese

1/4 cup Greek yogurt (or Greek Yogurt Sour Cream)

1 can Diced Green Chiles

1 pound Ground Beef

4 ounces cream cheese

½ a packet of Taco Seasoning *Tip: Save the other half for your next Mexican dish! Or use it all for extra flavor

Kosher salt and freshly ground black pepper, to taste

2 Avocados

1 bunch fresh Cilantro

EnchiladaPasta

Preheat oven to 350 degrees. Lightly oil your baking dish or coat with nonstick spray.

In a large pot of boiling salted water, cook pasta according to package instructions; drain well.

In a large bowl, combine enchilada sauce, corn, beans, 1/2 cup cheddar cheese, 1/2 cup Monterey Jack cheese, Greek yogurt and green chiles; set aside.

Side Note: Funny story. So the first time I made this I somehow missed out on cue to add enchilada sauce (even though I had purchased it). Exit stage left Mary, I know. However, I wanted to mention it here because if you have someone in your family, someone you are cooking for, or whatever the case may be, that doesn't like enchilada sauce… this recipe turned out amazingly without it. Just trust me. All of the other flavors from the diced green chiles, cilantro, avocado, etc are enough to get you in the fiesta mood.

Now that I have sufficiently embarrassed myself. Let’s move on J Add ground beef to the skillet and cook until browned, about 3-5 minutes. Stir in cream cheese and taco seasoning until cream cheese has melted. Stir in pasta and enchilada mixture until well combined; season with salt and pepper, to taste.

Add pasta to prepared baking dish and top with avocado and remaining cheeses. Place into oven and bake until cheeses have melted, about 5-10 minutes.

Serve immediately, garnished with cilantro. The more the merrier.

enchiladapasta2

Wednesday, January 22, 2014

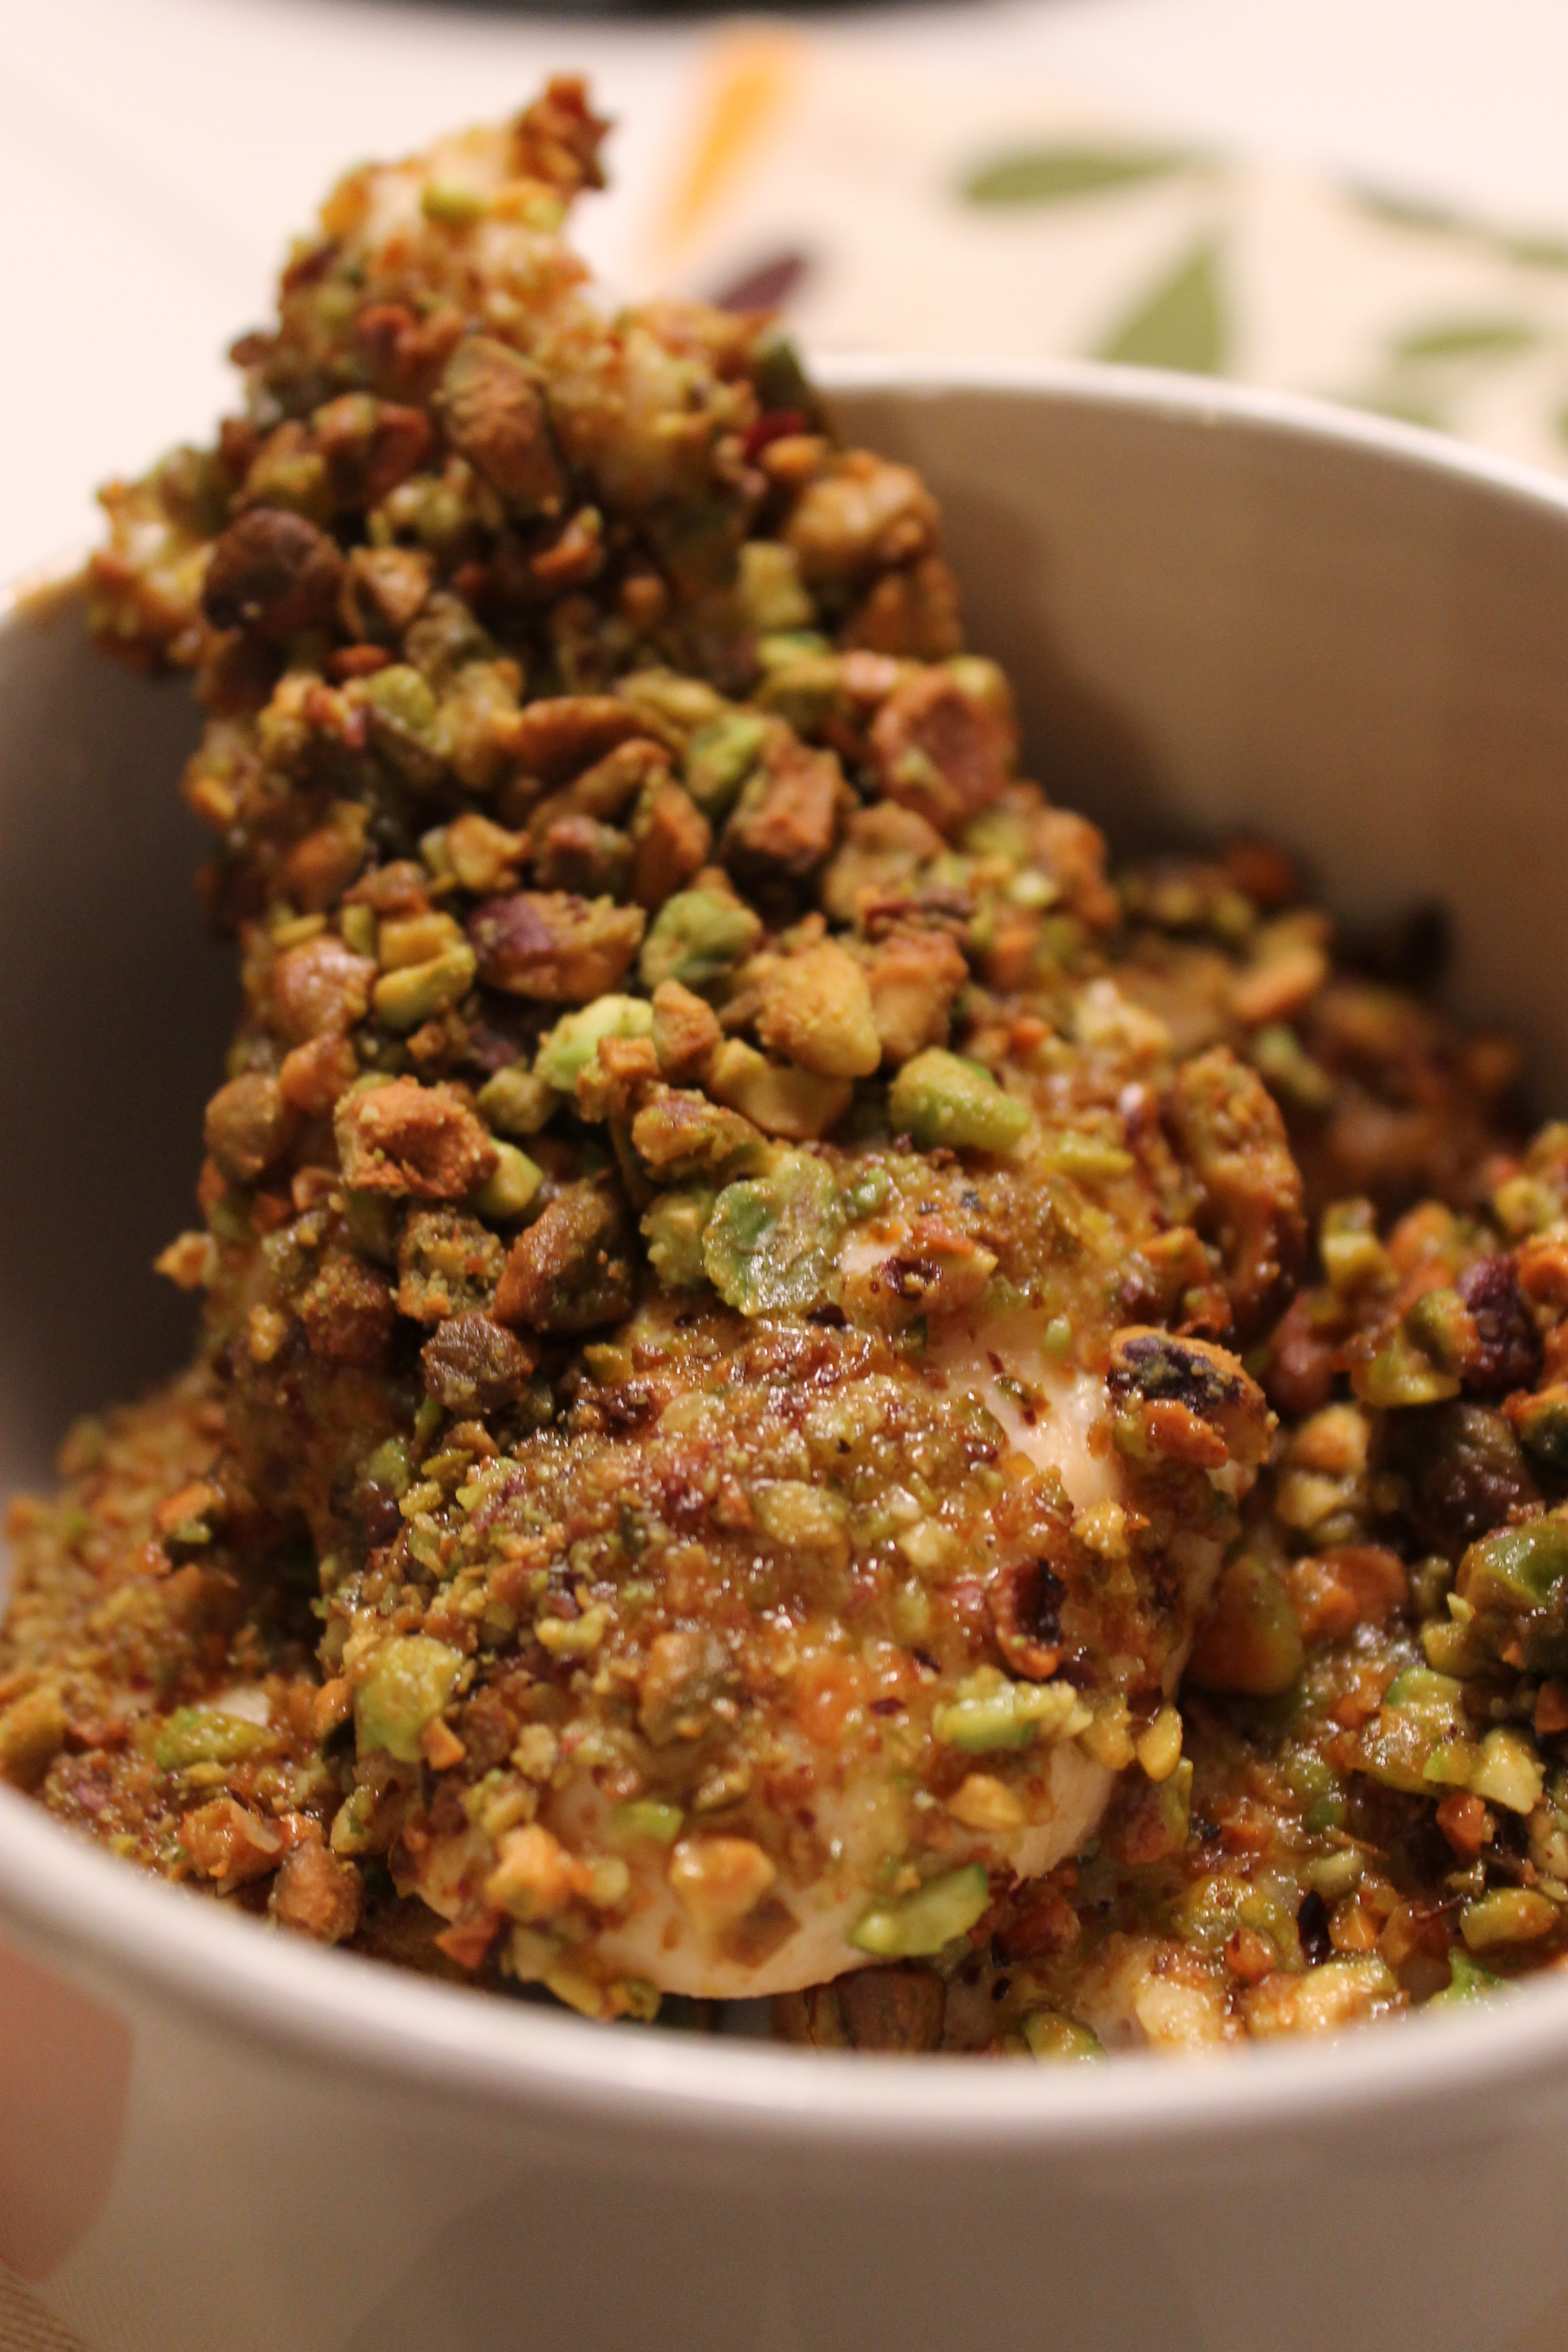
Pistachio Crusted Chicken

Pistachio Chicken1


I do love chicken, but I am constantly trying to find ways to keep it interesting. Well, HERE. WE. GO.  If you have kids, a picky eater, someone who loves chicken, or really just anyone... they will probably love this recipe! I had it for the first time at a dinner party and fell in love. After making it a couple of times, I found what version of it worked best for me. It pairs really well with mashed potatoes and creamed spinach. Basically heaven on a plate. Give it a try and please do tell me what you think!

Pistachio Crusted Chicken

1 cup chopped/smashed Pistachios (or any pistachio blend) *no shells

½ cup of Bread Crumbs

½ cup of Olive Oil

¼ cup of Honey

*Some recipes call for 2 tablespoons of Dijon Mustard in the sauce - you are welcome to try that as well!

Salt and Pepper to taste

1 ½ pounds of Boneless Chicken Breast Tenderloins (Chicken Strips)

Preheat oven to 375 degrees F. For easy clean up, line your baking sheet with tin foil or lightly coat it with cooking spray.

Chop your pistachios, or I prefer to add them to a quart size plastic bag and smash them with a handy wine bottle. Mix together the pistachios and bread crumbs in a bowl. In a separate bowl, mix the olive oil, honey, salt and pepper together until smooth. Dip the chicken tenderloins into the olive oil mixture, and then coat it with the pistachio mixture. Place the tenderloins onto the baking sheet.

Place the baking sheet into the oven. Bake the chicken tenderloins until the chicken is no longer pink and the coating starts to turn golden brown. The cooking time takes anywhere from 10-20 minutes depending on the size of the tenderloins. Just keep a keen eye on ‘em! You’ll know. It will look a little something like this...

Pistachio Chicken2


You really can't beat the mixture of salty (pistachio) and sweet (honey) flavor that comes packed into these chicken tenderloins. I recommend trying this recipe even if you are not a pistachio lover - you will be pleasantly surprised!


Pistachio Chicken1

Sunday, December 29, 2013

Man Pleasing Chicken

009

Pinterest is every girl's best friend. Really I don't know how our Mothers and Grandmothers weathered the cooking, party planning and baby planning storm without it! With that said, when I came across this recipe - the name said it all. It's the grown up version of sweet and savory honey mustard sauce... smothered... all over... everyone's favorite: chicken.

Some versions of this are done with chicken breasts or bone-in chicken thighs, well friends, time and time again I prefer the boneless chicken thighs for the flavor and texture after a long baking time in the oven. This recipe is sure to please more than just the 'man' but the whole dinner table. I recommend serving it with mashed potatoes or cauliflower mash for a healthier take at the traditional mashers (see cauliflower mash recipe). NOTE: If you don't have much cooking experience but want to knock a dinner table's socks off, this is the recipe for you.

Man Pleasing Chicken

1/2 cup Dijon Mustard

1/4 cup Maple Syrup

1 tbsp Rice Wine Vinegar

6 Chicken Thighs (1 1/2 pounds)

Salt and Pepper

Preheat oven to 450 degrees.

Mix Dijon mustard, maple syrup and rice wine vinegar together in a bowl. Place chicken thighs in oven proof dish salt and pepper chicken. Be sure to use your tin foil for easy clean up. Pour mustard, maple, vinegar mix over the the thighs. Turning the thighs over so they are fully coated.
 011


Put your chicken in the oven and set the timer for 40 minutes. I have found that the amount of time the chicken takes can range anywhere from 25-40 minutes (I personally like mine to have some browning on the top). I would recommend checking  the chicken's temperature at 25 minutes. When the chicken is 155 degrees Farenheit it is done. When it is done, remove it from the oven and let it rest for 5 minutes before serving.


Top with green onions or chives if you prefer :)


 017

Thursday, February 7, 2013

Creamy Chicken Tinga Enchiladas

I typically don't find myself baking a whole lot, but this Mexican Enchilada dish changes my whole perception on baked meals.  Yes, it is that good. It is a perfect combination of flavors ranging from spicy to creamy.  This dish also makes it easy to make a delicious Mexican feast for a crowd; all within one baking pan.  You will have your friends thinking you are a Mexican chef with this one.  Although, with just a couple of specific grocery store purchases, this is actually one of the easiest meals I have ever made. And without further ado...

Creamy Chicken Tinga Enchiladas:

1 fresh Rotisserie Chicken

1 package of Flour Tortillas

1-2 cups of Sour Cream

1 packet of Chicken Tinga Seasoning

1 can of Red Enchilada Sauce

2 cups of shredded Mexican Blend Cheese

Some chopped Cilantro and/or Green Onions for added flavor if you prefer

First preheat your oven to 375 degrees.

Then shred the already-cooked rotisserie chicken making sure to discard any small bones.  Place the shredded chicken in a mixing bowl and add chicken tinga seasoning (pictured below) as well as the 1-2 cups of sour cream.  The amount of sour cream depends on just how creamy you would like the filling of your enchiladas to be.  This is the filling for the enchiladas.  You can certainly add cilantro or green onion to the filling if you wish to add a little more flavor. :)

00052100018072_full

Next, spoon about 2 tablespoons of this chicken filling into each of the flour tortillas.  A typical size baking dish normally allows for about 8-10 medium sized enchiladas. Once they have the chicken filling, you can now roll each tortilla up until it almost looks like a tiny burrito.  Place each rolled up and chicken filled enchilada in the baking dish side-by-side so that they are touching.

Now it is time to sauce these things! Open the can of red enchilada sauce (pictured below) and pour the entire contents over all of the enchiladas.  Sometimes two cans may be necessary depending on what kind of sauce person you are.  I always buy two, ya know, just in case.

51eB+VBFZLL._SL500_AA300_PIbundle-12,TopRight,0,0_AA300_SH20_

Lastly, the cheese.  Empty the content of the shredded cheese bag (normally around 2 cups) all over the top of the enchiladas.  These chicken-filled rollups should be covered in cheese people! Then place in the oven to bake for about 15 minutes or until all cheese is melted.

photo (9)

They are seriously so delicious! No need to head out to your local Mexican restaurant when you have this cooking in the oven at home.  I recommend home-made margaritas too.  It is a must-try. Typically I serve it with a side of rice or a fresh guacamole salad! YUM!